General Settings — Real Estate Website Builder
Configure your IDX site's SEO title and description, upload logos and favicon, set up header navigation, and add legal pages — all from one place in Panda IDX.
General Settings is the foundation of your Panda IDX real estate website. Configure the settings that apply to your entire site — SEO metadata, logos, header navigation, announcement bar, and legal pages — all from a single place before you launch or whenever your brand evolves.
Path: Pages → General Settings
TL;DR: Every setting here is a site-wide default. Individual pages (Homepage, Profile, Contact) can override the SEO values. Changes save immediately to your live website — there is no draft mode for General Settings.
SEO Settings
Your site-wide SEO title and description are the default values that appear in Google search results for any page that does not have its own override. Set these before you launch so every page starts with a strong foundation.
Step 1: Open General Settings
In your dashboard sidebar, click Pages, then General Settings. The SEO Settings card shows your current title and description at a glance.
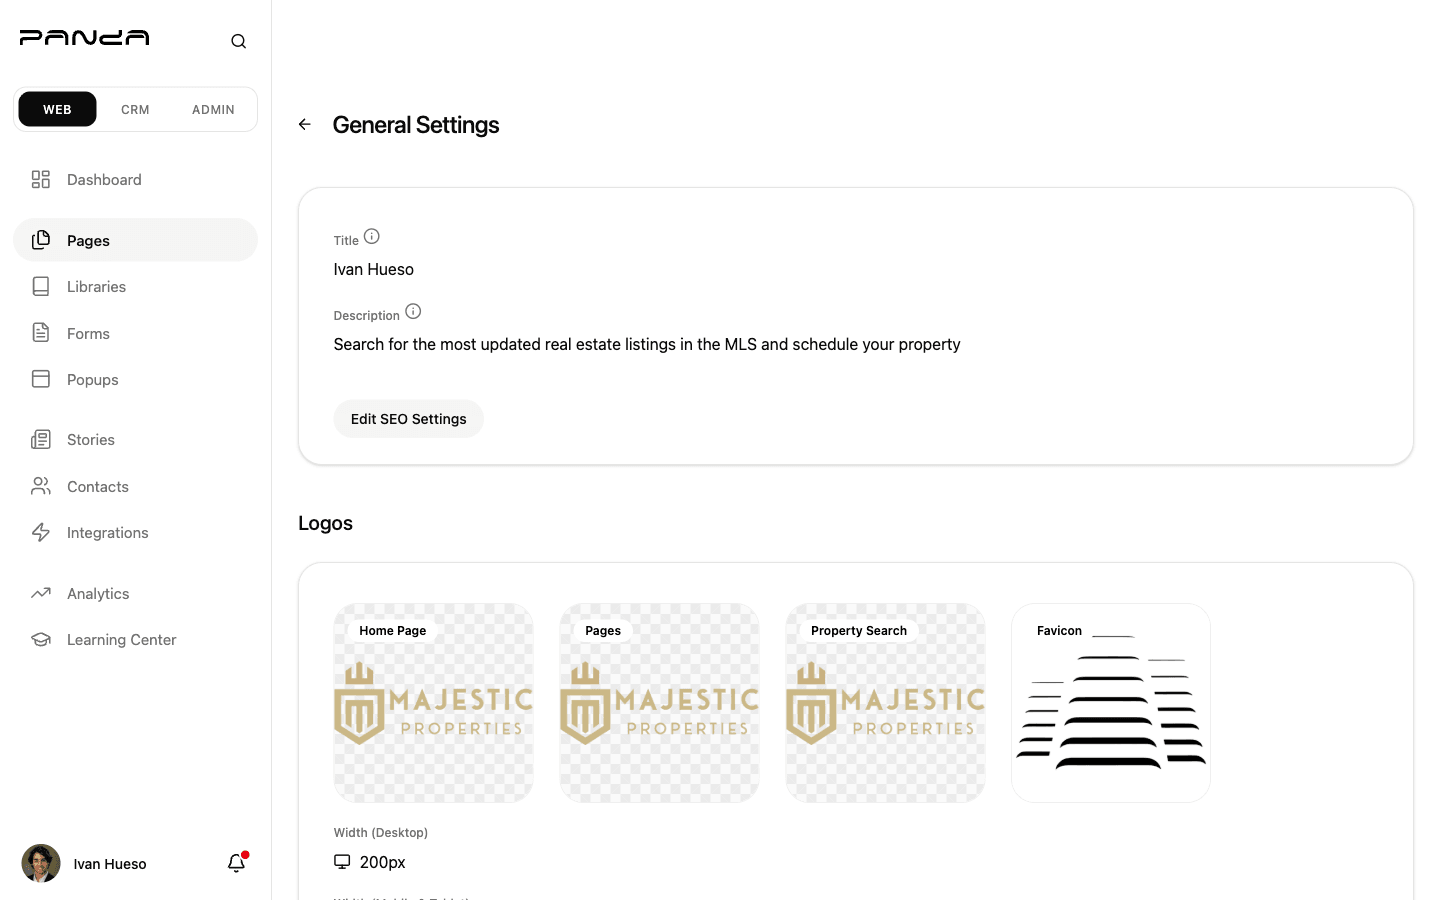
Step 2: Edit your SEO title and description
Click Edit SEO Settings. Enter your Title (50–60 chars) and Description (120–160 chars), then click Save.

Title formula that works: {Primary Market} | {Your Name}, {License Type} — e.g., "Miami Waterfront Homes | Jane Smith, Realtor" (47 chars). Keep it under 60 characters so it does not get cut off in search results. Individual page SEO settings always override this default.
Logos & Branding
Panda IDX uses four distinct logo slots because your website has different header contexts — a transparent homepage hero shows best with a light or white version of your logo, while interior pages and property search use the standard version.
Step 1: Find the four logo upload zones
Scroll to Logos. There are four upload zones: Home Page (transparent header), Pages (interior pages), Property Search, and Favicon (square browser tab icon, ideally 512×512 px).
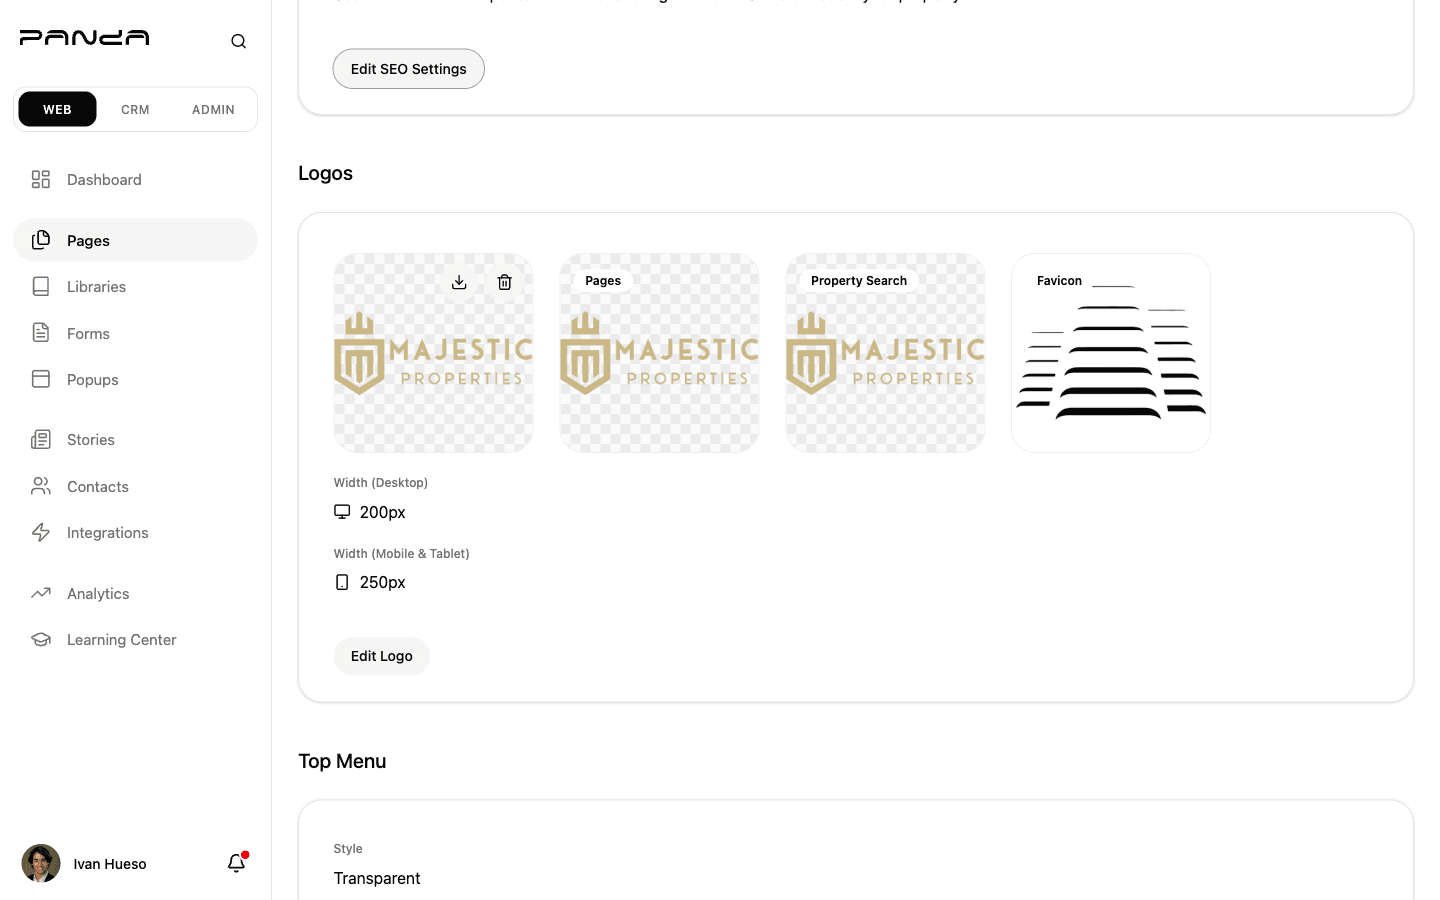
Step 2: Upload logos and configure display width
Click any upload zone to select and crop your image (PNG with transparent background recommended). Click Edit Logo to set the Desktop Width and Mobile & Tablet Width — default is 250 px for both.
If you only upload one logo, Panda IDX uses it as a fallback across all four zones. For the best visual result, upload at minimum two versions: one with a transparent or light-colored background for the homepage hero, and one in your standard brand colors for interior pages.
Header & Navigation
The header controls how your logo, navigation links, and optional announcement bar appear on every page of your site.
Announcement bar
Add a thin promotional bar above your main header — useful for limited-time offers, taglines, or links to key landing pages.
Step 1: Find the Top Menu section
Scroll to Top Menu. It shows the current style and any active message. Leave it set to Disabled if you do not need an announcement bar right now.
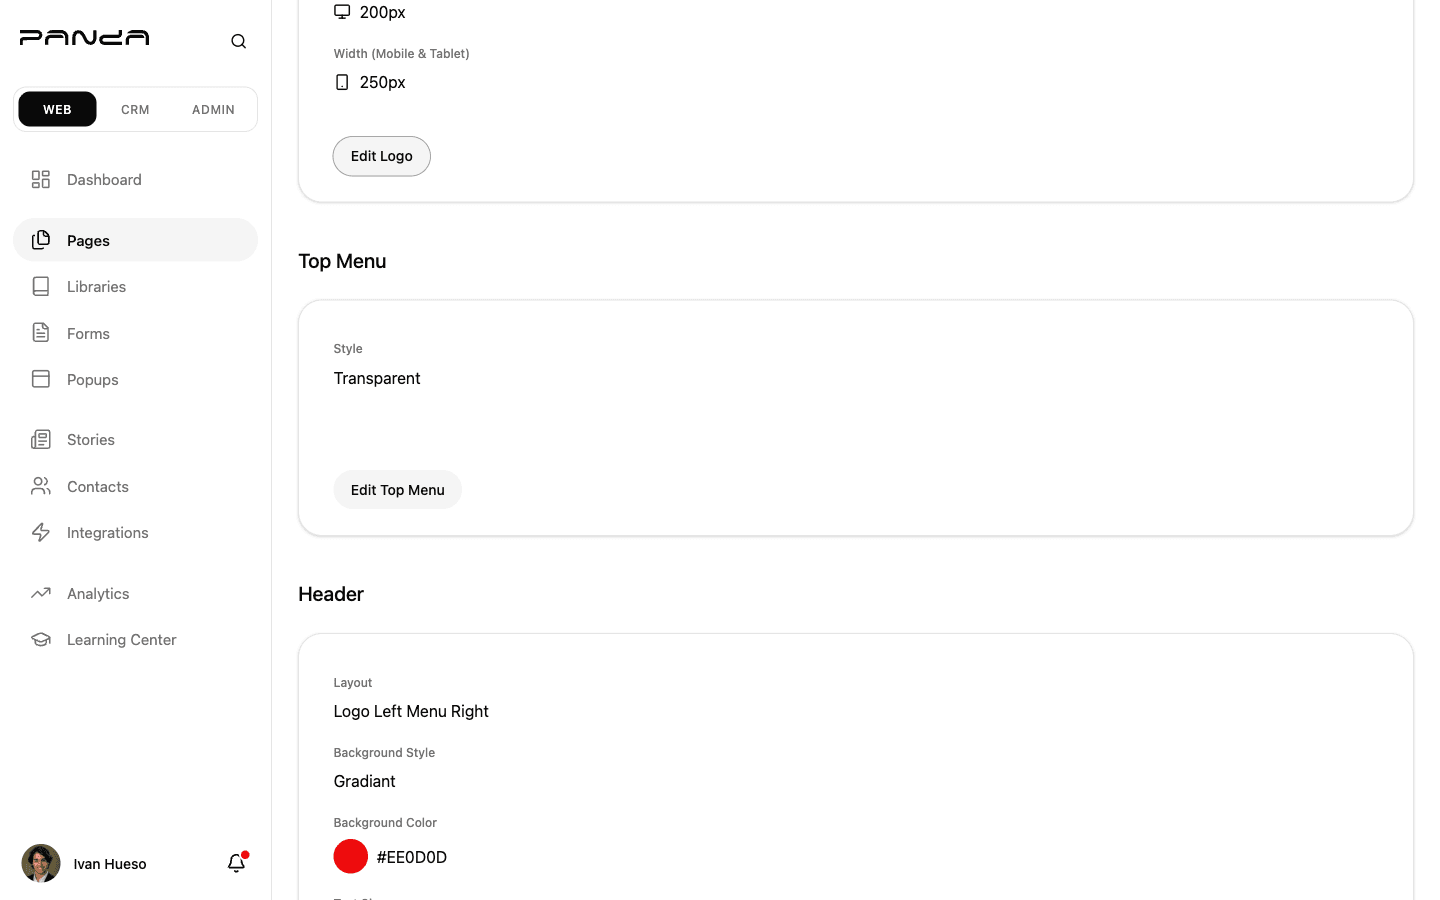
Step 2: Set style, message, and link
Click Edit Top Menu. Choose a Style (Disabled, Transparent, or Color), enter your message text, and optionally add an External Link so the bar clicks through to a landing page.

Navigation header
Step 1: Review your current header settings
The Header section shows your layout, background style and color, text size, font weight, and navigation menu type — all of which apply site-wide.
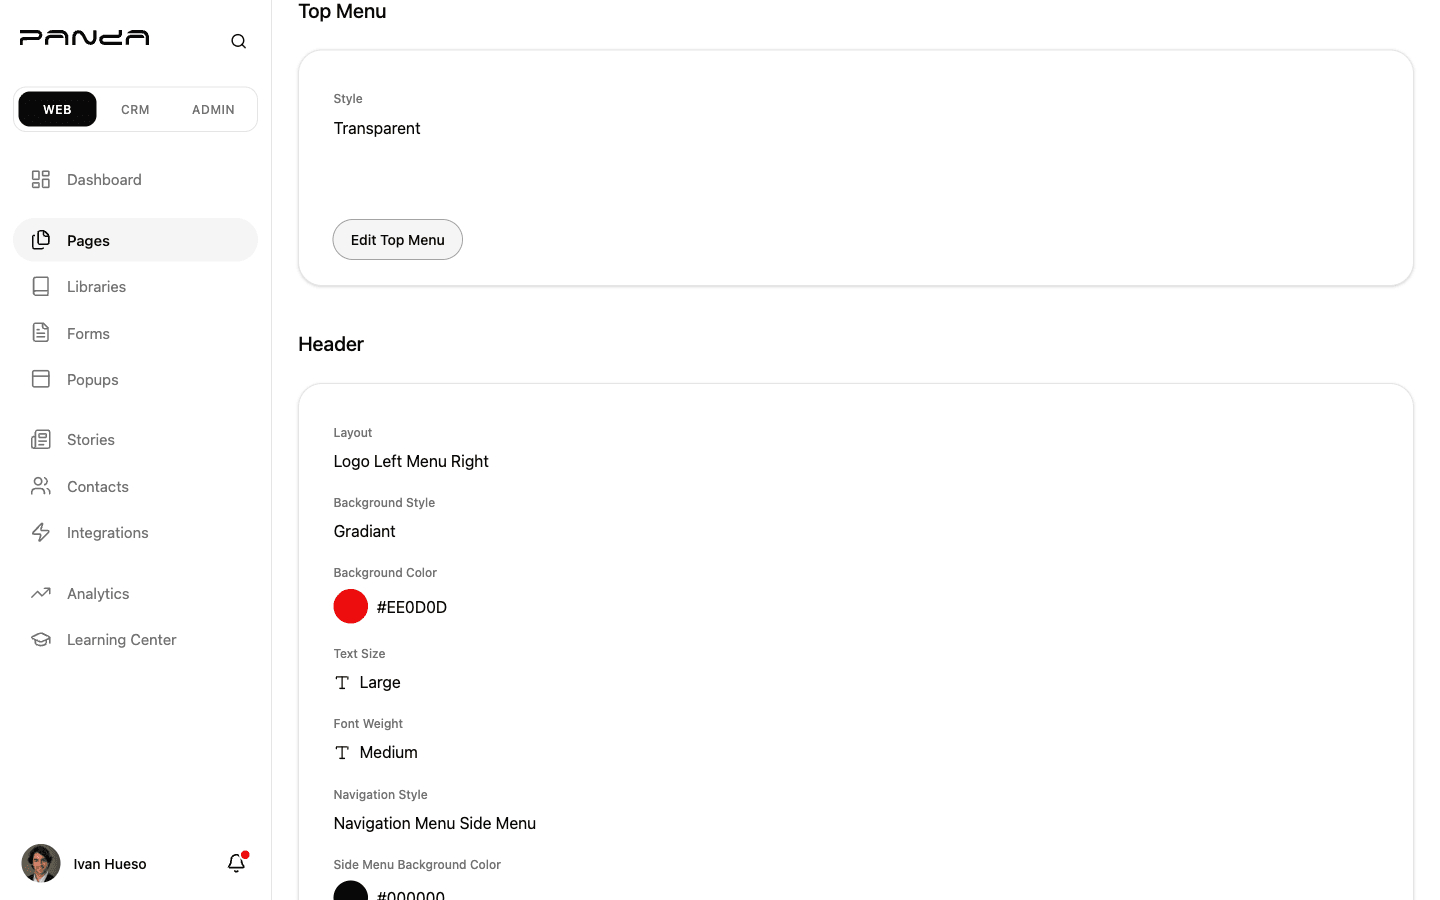
Step 2: Configure layout and style
Click Edit Header. Choose your Layout (Logo Center + Menu Below, Logo Left + Menu Right, or Logo Left + Menu Center), set the Background Style and color, then adjust typography and navigation menu behavior.
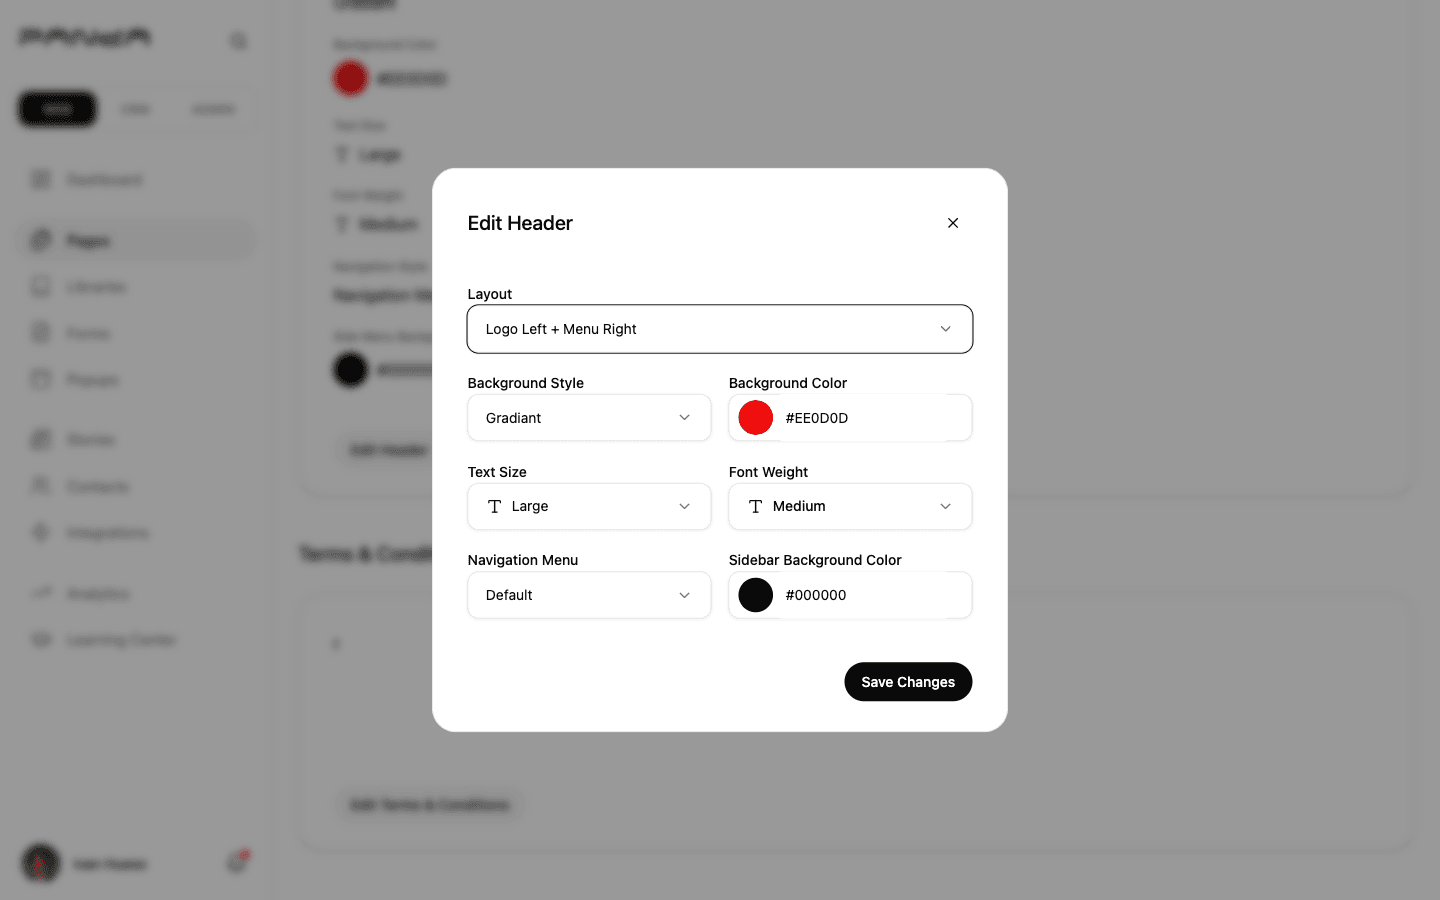
Transparent vs. solid header: Transparent headers overlay your hero image for a modern look, but text contrast becomes critical. If readability is a concern — especially on mobile — switch to a solid color background. The Side Menu Background Color controls the mobile hamburger menu independently from the desktop header.
Legal Pages
Required for IDX sites: If you display MLS listings, your Terms & Conditions must include the MLS data accuracy disclaimer and copyright notice required by your board. Review your MLS board agreement for the exact required language before publishing.
Step 1: Open the legal page editors
Scroll to the bottom of General Settings. Click Edit Terms & Conditions or Edit Privacy Policy to open the rich text editor — format with headings, bold, links, and lists, no code required.
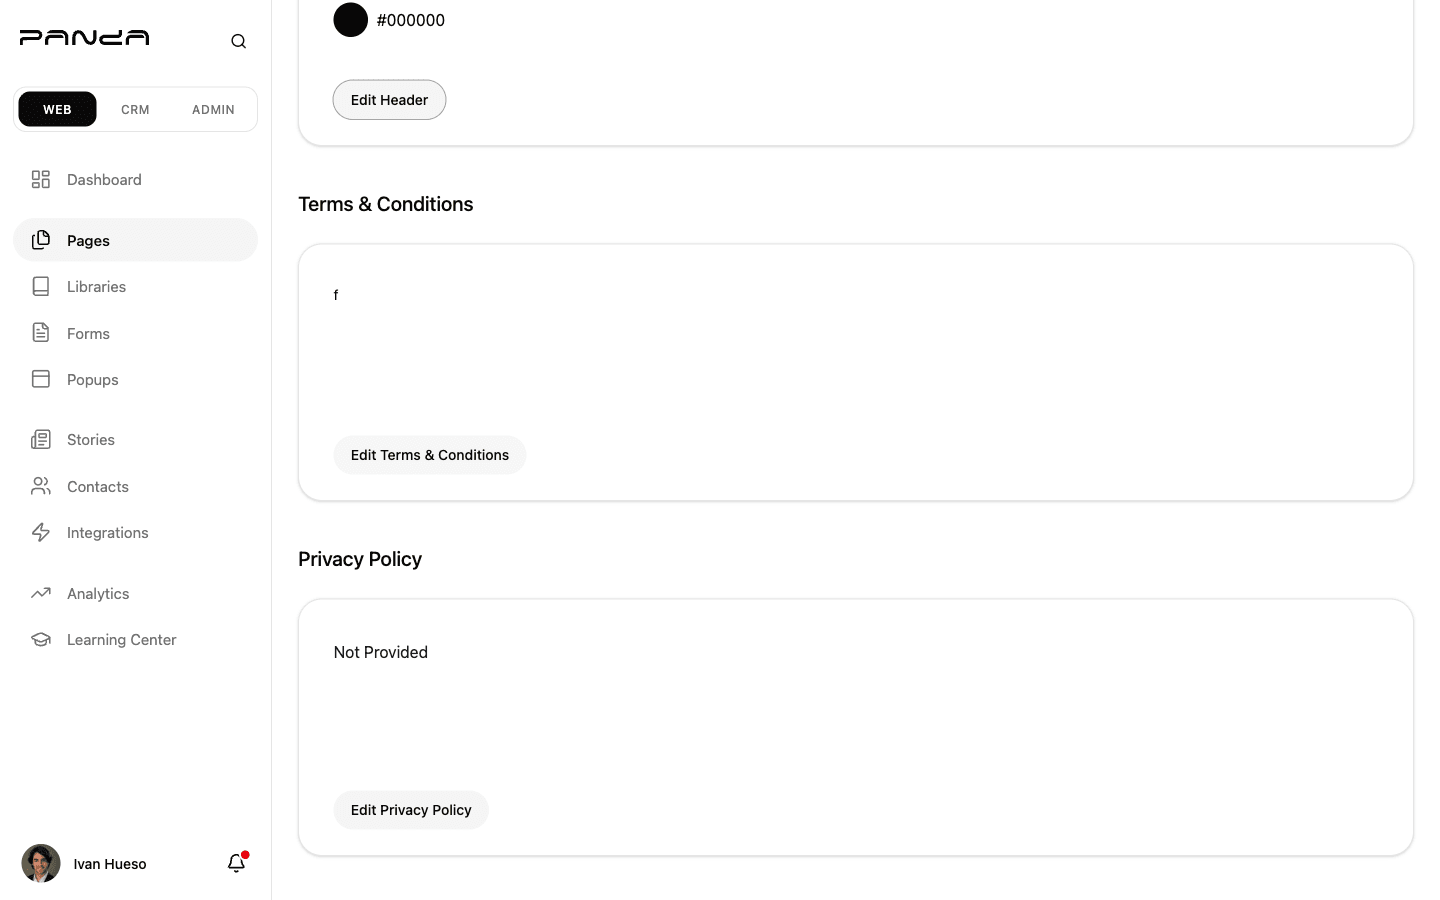
Both pages are publicly accessible on your Panda IDX website at /terms and /privacy. If the editors are left blank, these sections will not be shown to your visitors.
Frequently asked questions
What size should my logo be for my real estate website?
Upload your logo as a PNG with a transparent background — aim for 300–600 px wide at 2× resolution for crisp retina display. Panda IDX supports four logo variants (Home Page, Pages, Property Search, Favicon), so you can optimize each placement. Keep file size under 200 KB to avoid slowing your header load time.
What should my real estate website SEO title include?
Lead with your primary market or specialty, your name or brokerage, and a brief differentiator — for example: "Miami Waterfront Homes | Jane Smith, Realtor." Keep it under 60 characters so it displays fully in search results. Avoid stuffing multiple cities; create separate pages for each market instead.
What does a favicon do for my real estate website?
A favicon is the small icon that appears in browser tabs, bookmarks, and mobile home screens next to your site name. It makes your site look professional and helps clients recognize your tab when they have multiple windows open. Upload a square image at 512×512 px (PNG or ICO) for crisp display across all devices.
How often should I update my site-wide meta description?
Review it once or twice a year, or whenever your market focus shifts. Google does not use it as a direct ranking signal, but it directly affects click-through rate from search results. A compelling 120–160 character description that names your market and highlights a key benefit can noticeably improve traffic.
Will my logo display differently on mobile versus desktop?
Yes — Panda IDX lets you set separate widths for desktop and mobile. On mobile, headers collapse and logos scale down, so ensure your logo is legible at 150–200 px wide. The Edit Logo dialog in General Settings gives you independent Desktop Width and Mobile and Tablet Width controls to fine-tune each breakpoint.